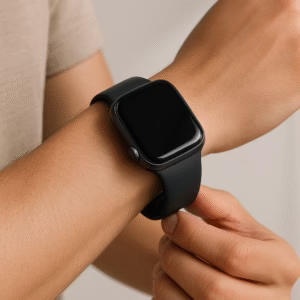
Switching out the strap on your Apple Watch can completely change the look and feel of your watch. Whether you’re going from a sporty silicone band to a sleek leather loop, or just swapping colors to match your outfit, the process is quick and—yes—totally doable without any special tools.
If you’ve just bought a new band and are wondering, “Do I really need a kit to put this on?” the answer is no. With a little patience and the right technique, you can change your Apple Watch strap at home in just a couple of minutes. This guide walks you through the process step by step, covers compatibility questions, and shares real-world tips from people who have done it countless times.
Why People Change Their Apple Watch Straps
Before we get into the “how,” let’s talk about the “why.” Changing straps isn’t just about style—though that’s a big part of it.
- Comfort – You might find a different material more comfortable for workouts, sleep, or all-day wear.
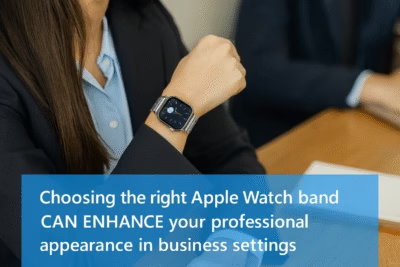
- Functionality – Some straps, like silicone sport bands, are better for swimming, while leather or stainless steel may be better for office wear.
- Durability – Over time, straps get worn out. A quick swap can make your watch look brand new again.
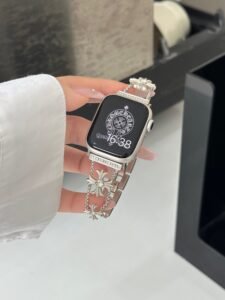
- Personalization – Apple Watches are as much a fashion accessory as a tech device. Changing bands lets you express your style.
Check Your Apple Watch Band Size and Compatibility
One of the biggest mistakes people make is assuming all bands fit all Apple Watch models. The reality is, Apple has grouped watches into two size ranges, and as long as you stay within your size range, you’re good.
Apple Watch Case Sizes and Band Fit
- Small case sizes: 38mm, 40mm, 41mm → interchangeable with each other.
- Large case sizes: 42mm, 44mm, 45mm, 49mm → interchangeable with each other.
So, if you have a 44mm Apple Watch Series 6 and you buy a band labeled for 42mm, it will fit just fine.
Series Compatibility Chart
| Apple Watch Series | Small Size (mm) | Large Size (mm) |
|---|---|---|
| Series 1–3 | 38mm | 42mm |
| Series 4–6, SE | 40mm | 44mm |
| Series 7–9 | 41mm | 45mm |
| Ultra / Ultra 2 | — | 49mm |
💡 Pro Tip: The Ultra models (49mm) are compatible with large-size bands, but due to the thicker case, some bands may look slightly different when fitted.
What You’ll Need Before You Start
Good news: you don’t need any official Apple Watch band installation tools. What you do need is:
- A clean, flat surface (a desk or table works fine)
- A soft cloth or microfiber towel (to avoid scratching your watch)
- Your new Apple Watch strap (check size compatibility first)
- Your Apple Watch (obviously)
Step-by-Step Installation Without Tools
Here’s the simple, no-tools method that works for every Apple Watch strap Apple has ever made.
Step 1: Lay Your Watch Face Down

Place your Apple Watch face down on a soft cloth. This keeps the display safe from scratches and smudges.
Step 2: Locate the Band Release Buttons
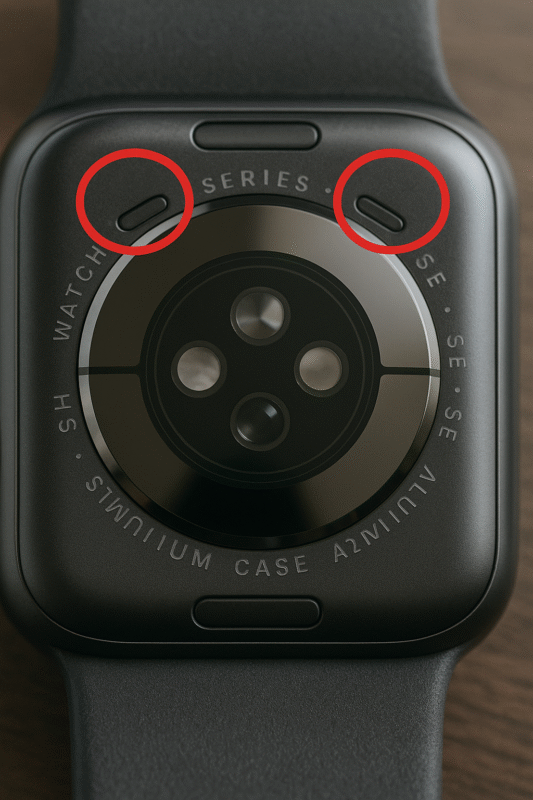
On the back of your Apple Watch, you’ll see two thin oval buttons—one at the top, one at the bottom—just where the strap connects to the watch case.
Step 3: Press and Hold the Release Button
Using your fingertip (no need for a sharp tool), press down on the button. You don’t need to press hard—just enough to feel it give a little.
Step 4: Slide the Old Band Out
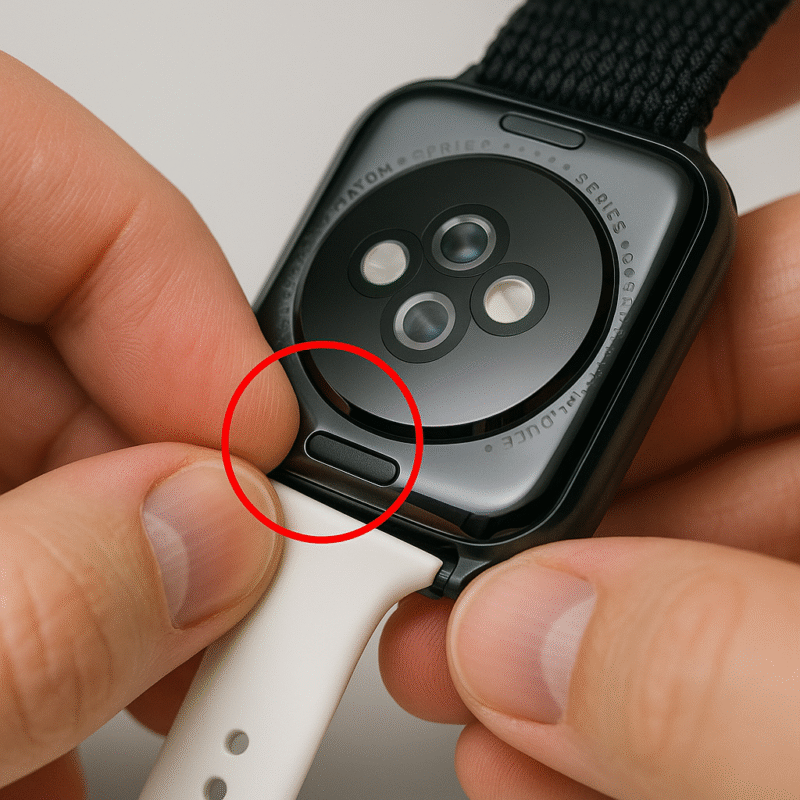
While holding the button, gently slide the strap sideways out of the slot. If it feels stuck, don’t force it. Wiggle it gently to loosen any dust or debris in the connector.
Step 5: Align Your New Strap
Look for the small metal or plastic connector on your new band. Align it with the groove in your watch’s band slot. Most bands are directional—meaning they have a “top” and “bottom”—so check that it’s facing the right way.
Step 6: Slide It In Until It Clicks
Gently push the strap into the slot. You should feel (and sometimes hear) a small click when it’s fully in place. If it doesn’t click, try removing it and sliding it in again—sometimes the connector just needs a tiny adjustment.
Step 7: Repeat for the Other Side
Do the exact same steps for the other side of the band.
Installing Different Types of Bands Without Tools
Not all bands feel the same when you put them on. Here’s what to expect from the most common types:
1. Sport Bands
- Material: Soft silicone
- Installation: Smooth and flexible, slides in easily
- Tip: Make sure the pin-and-tuck closure is on the correct side for your wrist
2. Leather Loops
- Material: Textured leather with magnetic closure
- Installation: Same sliding method, but keep the magnets away from your watch until the band is in place to avoid snapping unexpectedly
3. Braided Solo Loops
- Material: Stretchable recycled yarn
- Installation: One-piece design—slide in the connector like usual; no clasp to adjust
4. Stainless Steel Link Bracelets
- Material: Metal links
- Installation: Feels heavier; make sure each side is aligned before sliding into place
Troubleshooting Common Issues
Even without tools, installation should be smooth. But if you hit a snag, here’s what to do:
Band Won’t Slide In
- Check the band orientation—if it’s upside down, it won’t fit
- Blow gently into the slot to remove dust
Band Feels Loose
- Remove and reinstall; a proper click means it’s locked
- If it still feels loose, the connector might be worn and needs replacing
Release Button Stuck
- Press multiple times gently to loosen it
- If debris is blocking it, use a soft brush to clean
Apple Watch Band Size Compatibility Guide (Detailed Table)
Before you buy or install a new strap, you’ll want to double-check your watch model and size. Below is a quick reference table that covers every Apple Watch released so far.
| Apple Watch Model | Small Band Size Compatibility | Large Band Size Compatibility |
|---|---|---|
| Series 1, 2, 3 | 38mm | 42mm |
| Series 4, 5, 6, SE (1st Gen) | 40mm | 44mm |
| Series 7, 8, 9, SE (2nd Gen) | 41mm | 45mm |
| Ultra, Ultra 2 | — | 49mm |
Quick Tip: Apple designed these sizes so that if you stick within the same “small” or “large” category, the bands will fit across models. That’s why a 42mm Series 3 band fits a 44mm Series 6 perfectly.
Material-by-Material Installation Tips
Silicone Sport Bands
- Flexible and easy to slide into the slot
- Works great for workouts, swimming, and casual wear
- Tip: Make sure the “pin-and-tuck” closure faces the correct side of your wrist
Leather Bands
- Premium feel; great for office and formal settings
- Some come with a magnetic loop, others with a classic buckle
- Tip: Keep leather dry during installation to prevent stretching
Metal Link Bracelets
- Heavy and solid; durable for years
- Usually has a butterfly clasp or deployment clasp
- Tip: Align both connectors perfectly before sliding to prevent scratches
Braided Solo Loop
- No clasp; stretches over your hand
- One-piece connector slides in easily
- Tip: Choose the correct length before buying—no adjustments possible later
Real-World Installation Scenarios
1. At the Office
Swap during your coffee break—takes under two minutes on a desk with a soft cloth.
2. At the Gym
Switch from leather to silicone before a workout; keep a cloth in your gym bag.
3. While Traveling
Use a hotel nightstand; if you don’t have a cloth, use the inside of a clean T-shirt.
Common Mistakes to Avoid
- Forcing the Band – If it’s not sliding smoothly, stop and re-check.
- Wrong Size – Always verify case size before buying.
- Skipping the Click – Without the click, it’s not secure.
- Ignoring Dirt – Clean connector slots regularly.
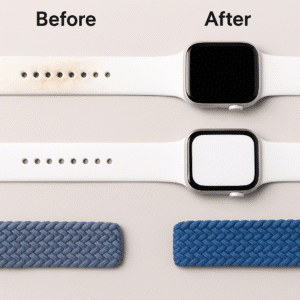
Cleaning and Maintenance
- Weekly Wipe-Down: Prevents sweat build-up.
- Seasonal Deep Clean: Soapy water for silicone/metal, avoid leather soaking.
- Connector Check: Monthly slide-in/out to test lock function.
Style & Pairing Suggestions
- Workday: Black leather loop + silver case
- Weekend: Bright sport loop
- Evening Event: Stainless steel Milanese loop
- Outdoor: Braided solo loop
Buying Tips
- Check Reviews before buying
- Look for Warranty on premium bands
- Consider Bulk Orders for style variety
FAQ
Q1: Can I install without tools? Yes, Apple designed it for finger-only swaps.
Q2: Will a 42mm fit a 44mm? Yes, same size group.
Q3: Band won’t click? Remove, clean, and try again.
Q4: How long does it take? Under two minutes.
Q5: Can frequent changes damage it? Not if gentle and clean.
Final Thoughts
Changing your Apple Watch strap without tools is fast, safe, and a great way to refresh your style. With the right size, clean connectors, and a soft surface, you can swap bands as often as you like—whether for comfort, style, or practicality.